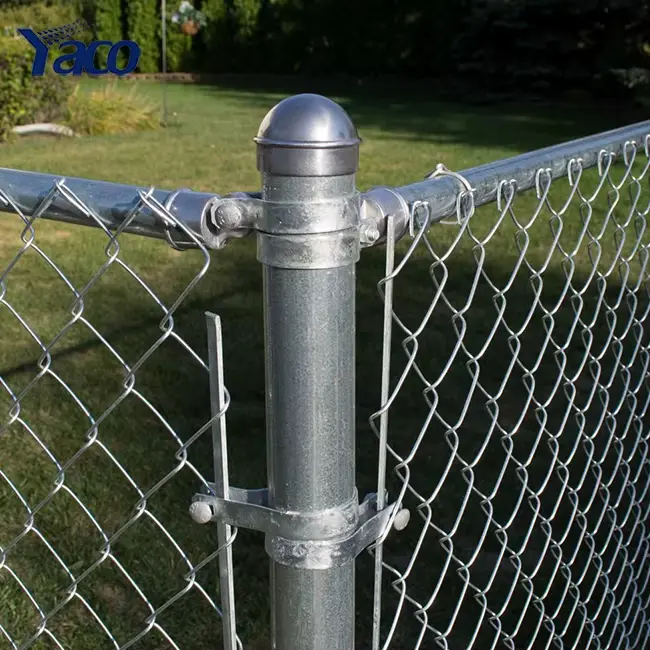
Chain link fences remain one of the most popular fencing options due to their durability, affordability, and relatively straightforward installation process. Whether you’re securing a residential property, containing pets, or fencing a commercial space, understanding the key considerations before installation can save you time, money, and frustration. This guide walks you through everything you need to know when planning your chain link fence project.

Planning Your Fence Installation
Property Boundaries and Permits
Before purchasing any materials, take these critical first steps:
- Survey your property: Confirm your exact property lines to avoid encroaching on neighboring land. Consider hiring a professional surveyor if you’re uncertain.
- Check local regulations: Contact your local building department about permit requirements, height restrictions, and setback regulations.
- HOA approval: If you live in a neighborhood with a homeowners association, submit your fence plans for approval before proceeding.
- Call before you dig: Contact your local utility locating service (usually by dialing 811) to mark underground utilities before digging post holes.
Measuring Your Space
- Measure the total linear footage needed, accounting for gates and corners
- Add approximately 10% extra for adjustments and waste
- Map out post locations, typically spaced 8-10 feet apart
- Identify gate locations and their sizes based on access needs
Fence Framework Components
Posts
- Terminal posts: Heavier, larger diameter posts used at ends, corners, and gates
- Line posts: Intermediate posts that support the fence between terminal posts
- Material quality: Look for galvanized steel with a minimum 1.8-inch outside diameter for residential use
Top Rail and Tension Wire
- Top rail: Provides structural support along the top of the fence
- Bottom tension wire: Secures the bottom of the fabric to prevent gaps
- Quality indicators: Smooth connections, consistent galvanizing, and properly sized fittings
Chain Link Fabric
- Gauge: Lower numbers indicate thicker, stronger wire (9-gauge for commercial, 11 or 12-gauge for residential)
- Galvanization level: Higher levels of zinc coating (measured in oz/sq ft) provide better rust resistance
- Mesh size: Standard 2-inch diamond pattern works for most applications, while smaller patterns offer more security
- Coating options:
- Galvanized (silver)
- Vinyl-coated (green, black, or brown for improved appearance and longer life)
- Aluminum (lighter weight with excellent corrosion resistance)
Hardware and Accessories
- Tension bands: Secure the fabric to terminal posts
- Tension bars: Vertical supports that run through the end links of the fabric
- Tie wires: Connect the fabric to line posts and top rail
- Post caps: Prevent water infiltration and improve appearance
- Concrete: Necessary for secure post installation
Installation Considerations
Terrain Challenges
- Sloped ground: Decide between stepped panels or raked installation (following the contour)
- Rocky soil: May require special equipment for digging post holes
- Tree roots: Plan post locations to avoid major root systems
- Drainage areas: Avoid installing posts in areas with poor drainage
Gate Planning
- Swing direction: Consider clearance needs and typical traffic patterns
- Width requirements: Allow enough space for equipment, vehicles, or wheelbarrows if needed
- Hardware quality: Invest in sturdy gate hardware with smooth operation
- Double vs. single gates: Based on access requirements
Weather Considerations
- Frost line: In cold climates, set posts below the frost line to prevent heaving
- Wind exposure: Higher wind areas require deeper post setting and potentially closer post spacing
- Coastal environments: Consider aluminum or vinyl-coated options for salt exposure
Tools and Equipment Needed
Essential tools for installation include:
- Post hole digger or power auger
- Concrete mixing tools
- Level and string line
- Pipe cutter or hacksaw
- Fence stretcher tool
- Pliers and wrenches
- Measuring tape
- Marking spray paint or stakes
Professional vs. DIY Installation
When to Consider Professional Installation:
- Large properties requiring extensive fencing
- Challenging terrains with significant slopes or obstacles
- Time constraints or limited physical ability
- Commercial or security applications requiring precise installation
DIY Advantages:
- Cost savings of 40-60% on labor
- Flexible timeline for completion
- Personal quality control
- Satisfaction of completing your own project
Maintenance Considerations
Plan for the long-term care of your fence:
- Inspection schedule: Check tension, posts, and fabric annually
- Rust prevention: Touch up any damaged galvanizing
- Vegetation control: Keep vines and plants from growing on the fence
- Snow removal: In winter climates, avoid piling snow against the fence
Cost Expectations
Budget for these typical expenses:
- Materials: $5-15 per linear foot depending on height and quality
- Tools: $100-300 if purchasing rather than renting
- Permits: Varies by location, typically $50-200
- Professional installation: Adds $10-20 per linear foot
Final Thoughts
A properly installed chain link fence can provide decades of service with minimal maintenance. Taking the time to plan thoroughly, select quality materials, and either learn proper installation techniques or hire a reputable contractor will ensure your fence meets your needs and stands the test of time. Remember that the cheapest option upfront may not be the most economical choice in the long term.